Breakout Session Materials Landing Page
NOTE: you do not edit the landing page directly.
The Breakout Session Materials page is generated automatically using a modified version of the theme’s “Session” “Content/Post Type Item” in the page builder section.
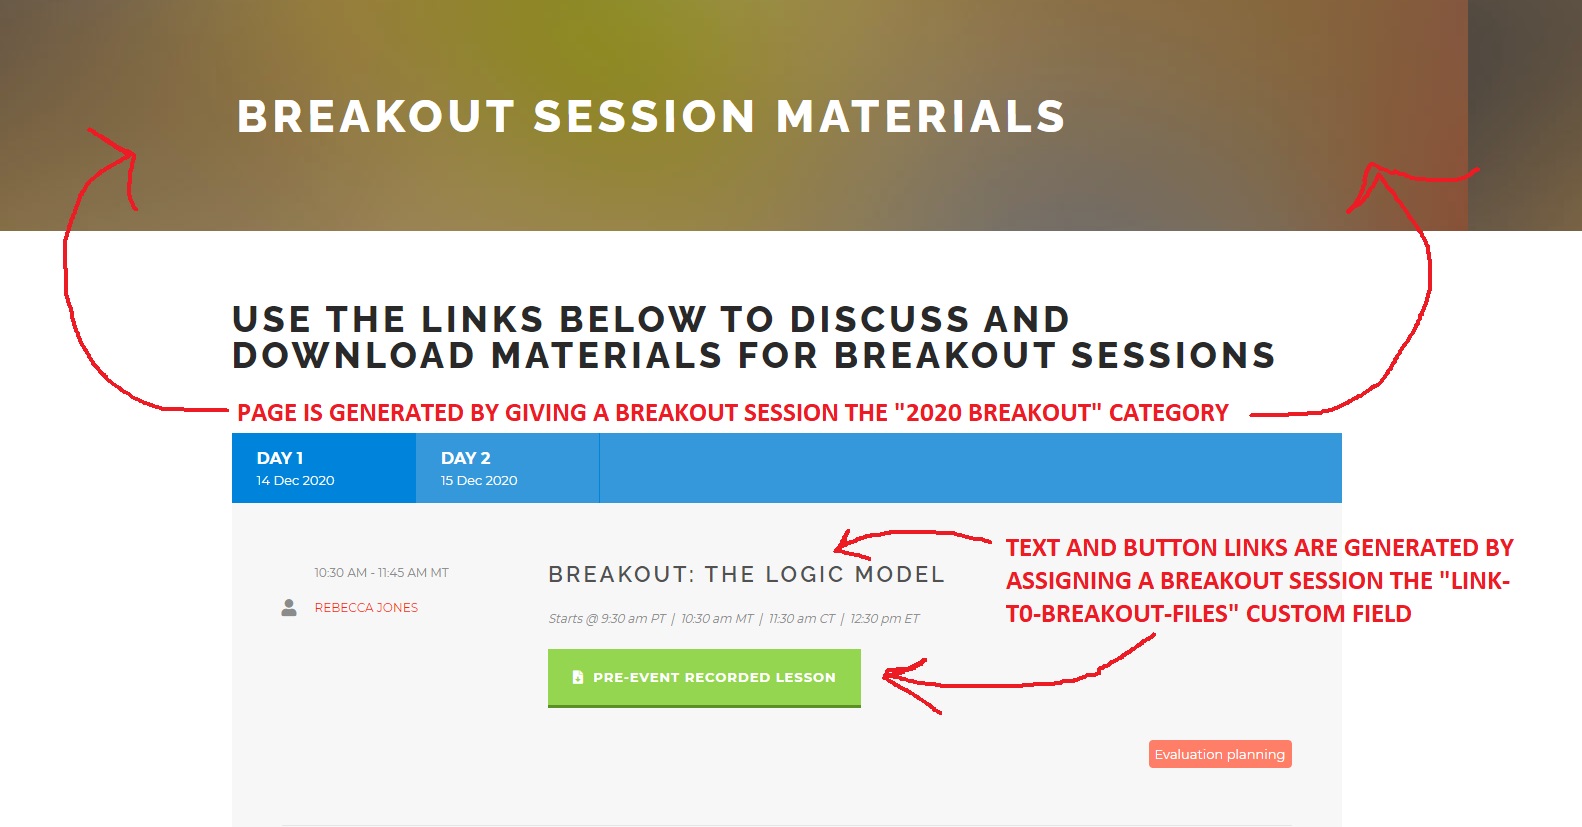
To appear on the Breakout Session Materials page, a Session must have the “2020 Breakout” category. To generate the big green “PRE-EVENT RECORDED LESSION” button, the session must have a Custom Field with the Name “link-to-breakout-files” and a value that is a…wait for it…link the breakout session’s lesson page.

Breakout Session Materials Lesson Pages
Each breakout session has its own “materials/lessons” page. NOTE: these pages are content type “Page” and are separate from the content type “Sessions” that we also create for each session. Creating and editing these pages is not much different than editing an event homepage.
- Lesson pages must have parent “Breakout Session Materials” in the Page Attributes > Parent box on the right side of the screen.
- All content for the page is contained in the Page Builder Options > Page Builder Section > Content (With Sidebar) Section section at the bottom of the screen.
- This section should contain 2 Column Wrapper Item items.
- 2/3 Column Item for the video(s)
- 1/3 Column Item for the download(s)
- This section should contain 2 Column Wrapper Item items.
You edit these sections as you normally would by clicking the “gear” icon on the right of each content item.

Videos
Videos are added by using iframe HTML code to embed a YouTube video. NOTE: you must be in “Text” mode in the editor to use HTML code.
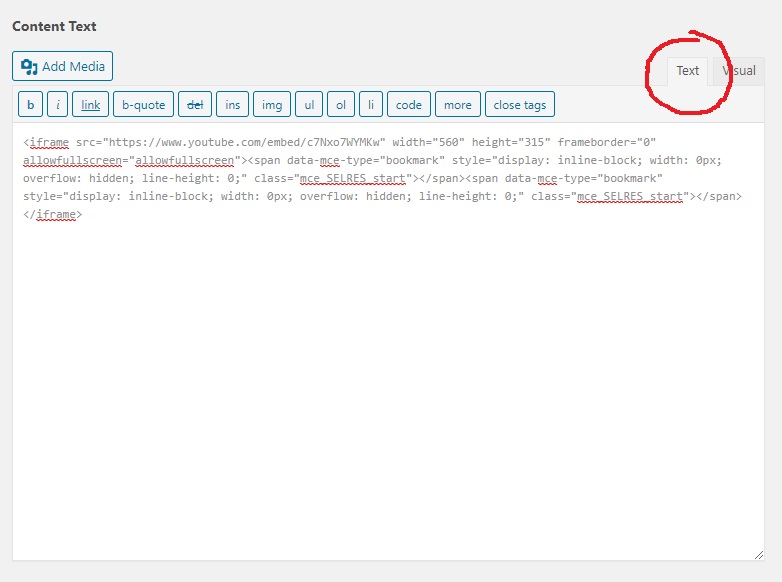
You can grab the code from any existing Lesson Page. The code is:
<iframe src="https://www.youtube.com/embed/UNIQUE_YOUTUBE_IDENTIFIER" width="560" height="315" frameborder="0" allowfullscreen="allowfullscreen"><span data-mce-type="bookmark" style="display: inline-block; width: 0px; overflow: hidden; line-height: 0;" class="mce_SELRES_start"></span><span data-mce-type="bookmark" style="display: inline-block; width: 0px; overflow: hidden; line-height: 0;" class="mce_SELRES_start"></span></iframe>
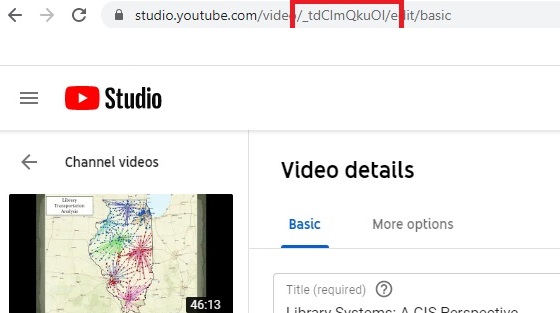
…where UNIQUE_YOUTUBE_IDENTIFIER is the random character string associated with each YouTube video. You can grab that from the URL in YouTube.
Downloads
All breakout files can go in the Media Library. Files are linked with buttons that are created using shortcodes. NOTE: you must be in “Visual” mode to use shortcodes. The shortcodes are created by clicking “GDLR Shortcode” in the editor’s menu. There are three buttons, each with a different color.
Example Button for Slides Example Button for Worksheet Example Button for File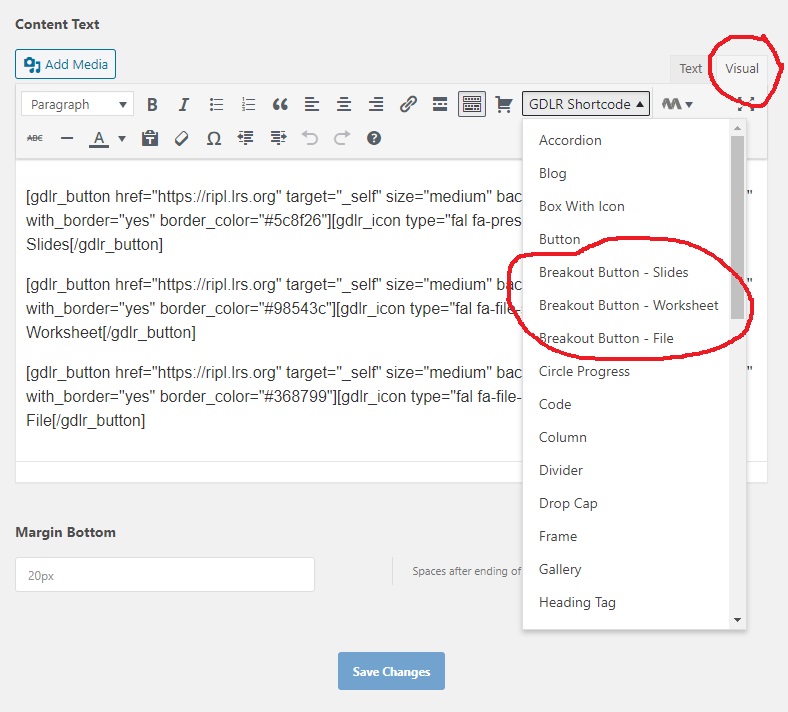
To create a button/link to a download:
- Upload the file to the media library.
- Copy the URL.
- Open the breakout’s lesson page for editing.
- While in “Visual” mode, insert a button shortcode by clicking “GDLR Shortcode” in the editor menu and selecting the appropriate button type.
- Modify the shortcode by changing the href=”” and replacing “https://www.ripleffect.org” with the file’s media library URL.
- If desired, change the button label from “File” to something that more specifically describes the downloadable, e.g. Activity, References, Assignment, Further Reading.
That’s It
Note that materials provided by instructors vary, so not everyone will have a “Worksheet.” That’s why I created the catch-all “File” button. If we decide we want more buttons, then I (Dave) must do that by modifying theme files.